Angles and Positions - page 2 of 3
Combinations and Systems
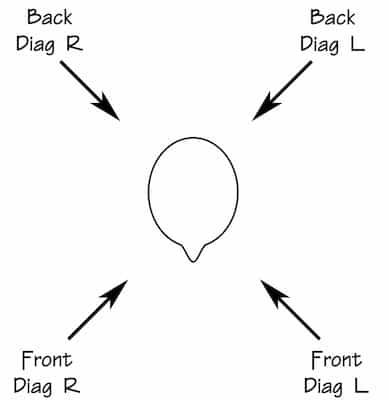
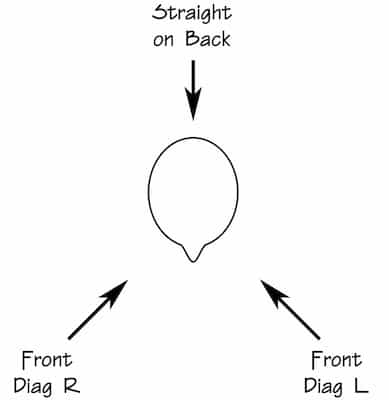
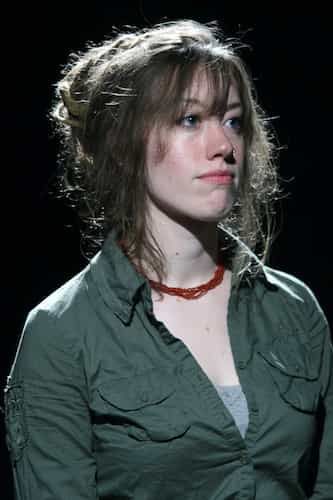
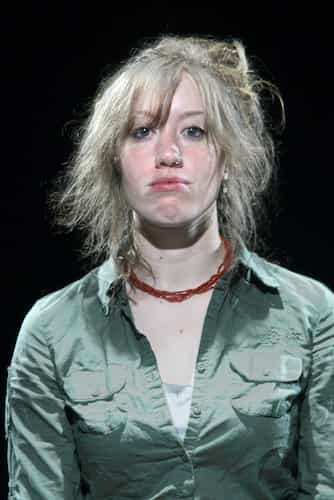
Diagonal Front & Diagonal Back
Two lights from opposite directions certainly provide better visibility and plasticity than single lights.
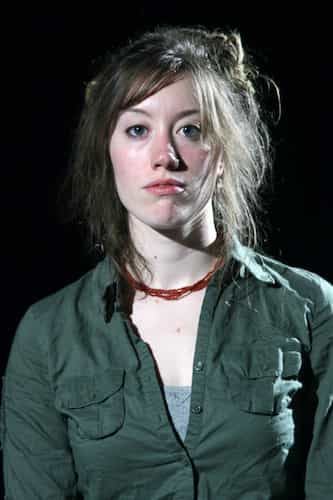
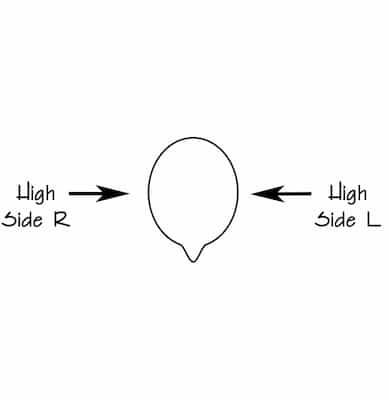
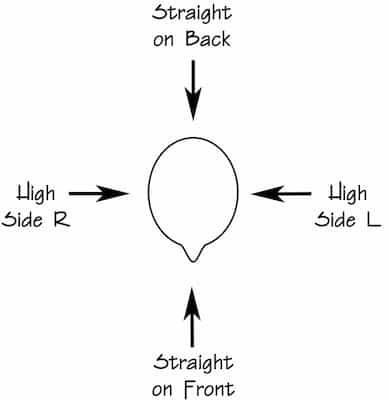
Interesting effects occur with two high sides.
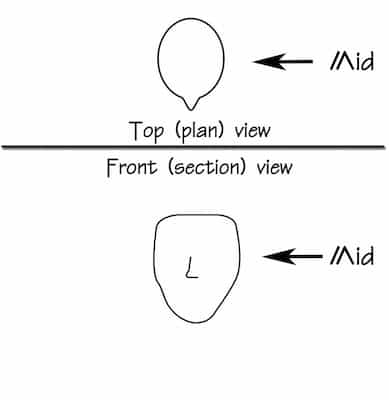
While they may appear to make the performer taller and thinner, an odd dark (shadow) line appears down the center of the face (and would continue down much of the body). Though this image doesn't include the arms and legs; think of what they would look like since the mass of the body would make each limb illuminated by one light.
These effects would be lessened if the lights were far to the side, but placed just downstage of the acting areas.
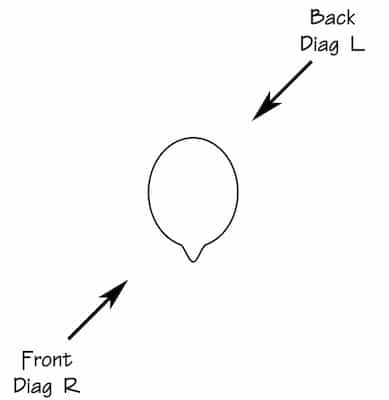
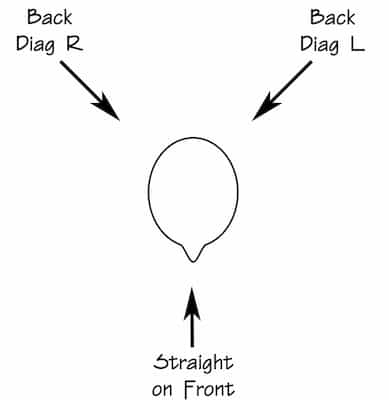
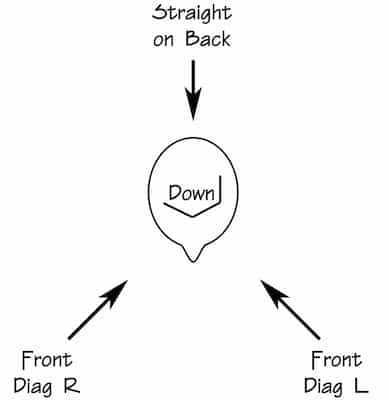
A 4-light system and a 3-light system.
An important note about these examples: All the lights in these system examples are at "full" / 100% intensity. Adding color (which also affects transmition / darkening the light) and changing the levels will generally increase plasticity and will affect visibility. |
A 4-light system typically surrounds the actor with instruments at 45-degree angles off axis to supply lighting for visibility (from the front) and diagonal backlights for plasticity (from the rear).

| Compare the "standard" 4-light system (above) to this one (right). How are plasticity and visibility impacted? Can you see the difference? |
A 3-light system surrounds the actor with instruments still at about a 45-degree axis above eye level but is spread at 120-degree increments around the actor. The style and needs of a production, of course, are the basis for using either of these systems or ignoring them.
| Compare the "standard" 3-light system (above) to this one (right). How are plasticity and visibility impacted? Can you see the difference? |
...plus a downlight.
Down lights, if added to either of these systems, are considered an enhancement more than increased lighting. A 4-light system with a downlight is called that, as opposed to a 5-light system, and a 3-light system with a down is not considered a 4-light system. Downlights are frequently added to aid in setting the mood and increasing dimensionality of the production.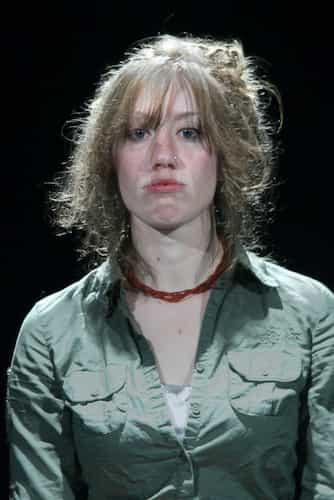

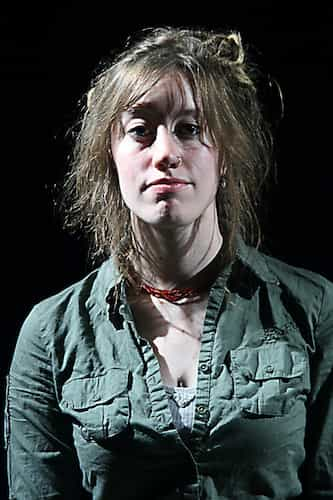
Other Lighting Positions.

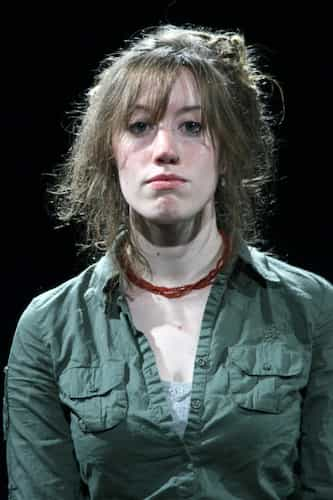
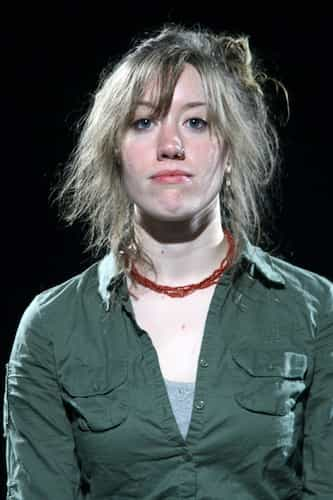
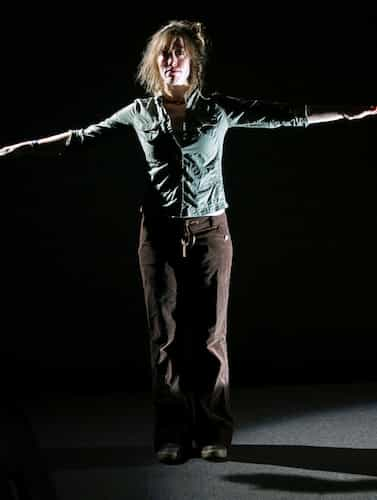
Jess with steep front light.
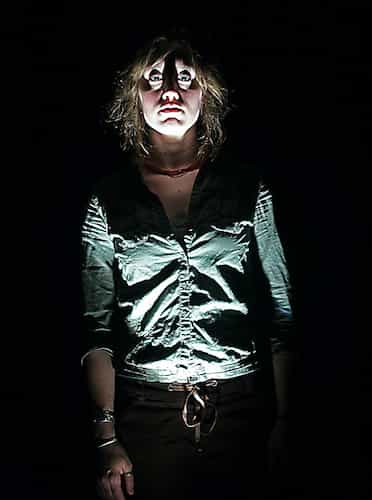

Can you guess where its name came from?
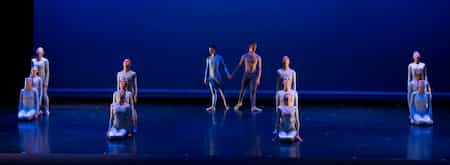
In this production photo from "Northern Suite", the dancers would not look quite so dramatic if the white light (from shin-busters) on them was also bleeding on the floor.
Production photo from "Northern Suite" dance performance Lighting Design by Adam Gillette

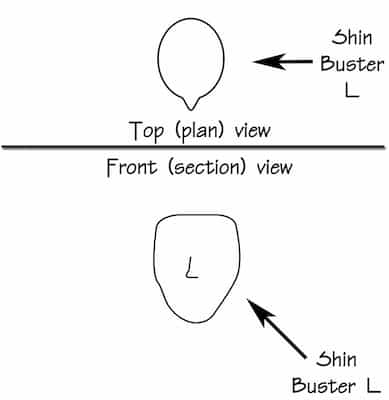
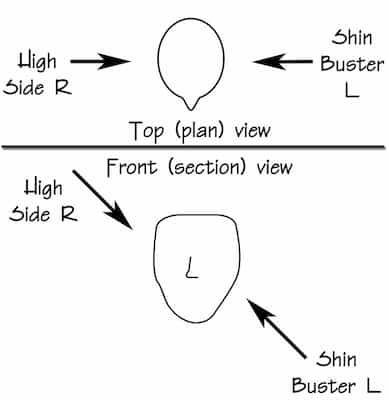
Shinbuster example image by Kade Mendelowitz
Primarily used in dance, the shin-buster strongly emphasizes a dancer’s body and movement. When properly focused to be above the floor, dancers can appear to be “floating in air.”
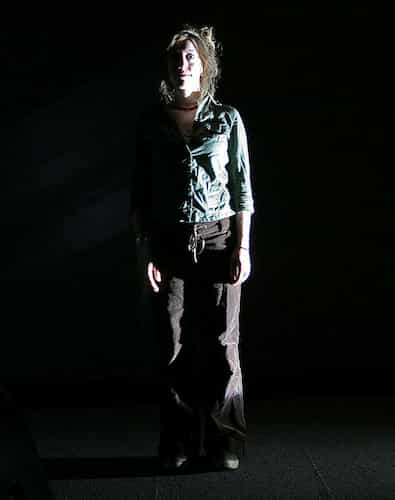
Production photo from "Picnic" by Lighting Designer by Kade Mendelowitz

“Shin-busters” don’t light the floor and, consequently, they can make the performer appear to “float” above the stage.
Shins also fill in under the raised arm (and leg) and so help accentuate the movement of the performer – very useful in dance!
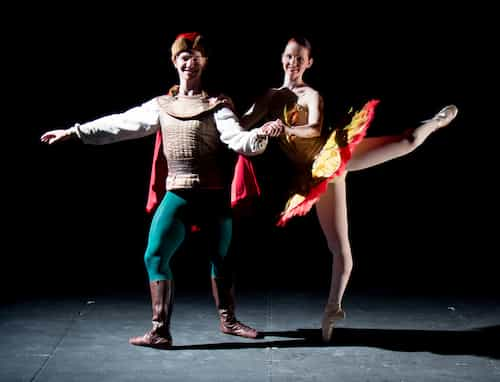
The results may not look very different when arms and legs are down - that quickly changes when large movements are introduced. Click one of the images for a closer look.